L-Camera TV #1 - Does Leica still make MP and M7? from Andreas Jürgensen on Vimeo.
Sunday, June 20, 2010
How a Leica is made.
A little insight to how a Leica is made. Each is handmade like a mechanical watch in Switzerland and Canon don't do that ;) Enjoy !
A Pilgrimage to Kranji War Memorial
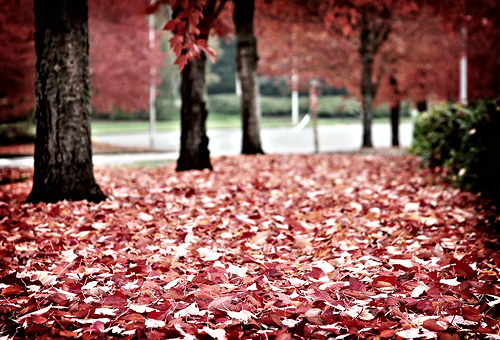
As a prelude to to the upcoming LO-FI project, I thought it might be good to show you some of my recent dabblings in LO-FI photography. In any case, since they are not colour photos, they would not be eligible for the exhibition anyways.
I have always mentioned from time to time that I have always wanted to go to the Kranji War Memorial to shoot, but most of the time people brush me off as a lil crazy as its super far. So this time I'm gonna prove to you that it is a place of interest worth the effort travelling to. But then again, please don't bring 20 photogers there and disturb the peace and serenity of the area.
I also want to prove to all you new generation photographers that film is not dead. There is very unique feel the film imparts to your photos; maybe its the wide exposure latitude or perhaps its the grain and tonality that imparts it an "old world" look. Whatever the reason, it surely still is worth the effort to shoot film.
And lastly, my inspiration for this set of works comes from the imaginary "Wu Xiao Kang" whose set of work caused quite a bit of stir when it was first posted online and when the truth came out later on. For those of you who remember the incident, you would know what I'm talking about. For those of you who don't, then I maybe one day I shall have the opportunity to show them to you. Regardless of the circumstances, the works themselves were indeed good and thought provoking and hence inspired me to carry out my latest project in a similar fashion. Except that I used 3 rolls instead of 1. Next time I'll shoot a perfect roll...
The following set of photos you are going to see was shot on 3 rolls of black and white film, 2 of which was developed in coffee; Nescafe if you really wanted to know.. All 3 rolls were developed entirely by myself; from shoot to scan.
I would like to start off with the following introduction,
"I was waiting for a ISO 200, 1/250 kind of day..."
Thursday, June 17, 2010
Convenience of the 7D =)
Hi Beautihoo Chewrens =)
While you wait patiently for JS's next tutorial, you can take a break from your revision (you have been studying right??) and watch my amateur-ly made Japan videos. I thought you better see mine first before you see PPC's Japan photos shot with 5DMkII and L lens LOL
Sorry my hands are not very steady so sometimes it's like Blair witch project hahaha and my 18-200mm is a bit ngeh ngeh (not smooth) so zoom in zoom out is argh argh argh...
I'm getting lazy... when I feel tired of shooting, I just switch to video mode heehee...
Shizuoka - the home of green tea with verdant tea fields and teahouses everywhere boasts of excellent views of Mt Fuji (if the weather permits). When we were there, we saw only clouds LOL it's also the childhood residence and retirement home of Ieyasu Tokugawa (who unified Japan). The Toshogu Shrine is the first and original one built by Tokugawa's son. The one in Nikko (built by his grandson I think) and all others copy its architecture. The Oigawa Railway is (I think) the only steam locomotive in Japan and definitely the only one which uses the ABT saw-toothed system to climb slopes. Okuoi kojo is a train station that sits on a dam. It's part of the rainbow bridge that runs across the dam.
There's some problem with the second transition...
Kawaguchiko, one of the Fuji five lakes boasts of splendid views of Mt Fuji (if the weather is good). The weather was not good when we were there hahaha but it was still beautiful =) Love the cute trains (at the beginning and end of the clip)
Two of the transitions are a bit off (see if you can spot them!) and I forgot to turn off the sound at the Kawaguchiko Natural Living Centre hahaha. Don't be so ngiao la!
Tateyama Alpine Route was the one I was most looking forward. Unfortunately, 2 days before our trip, the hotel sent us an email to inform us of a last minute maintenance at one part of the route so it was not possible to go all the way. But it's still really beautiful and I strongly recommend this place =)
Wednesday, June 16, 2010
Lesson 1 – Selective Tone

The oil spill. You know, the one that happened at our coast in the south? And the one that's raging the politicians over in the big U.S. of A. I tell you, it's a goddamn conspiracy for two major oil spills to occur within the same time. Gil Grissom from CSI would tell you that there is no such thing as a coincidence, and I'm inclined to believe him in this case.
And of course, there is the whole mess of the cleanup. Oxymoron aside, it's a well known fact that the operation at the Gulf of Mexico has seen failure after failure, and the oil still remains there today. On the other hand, we cleaned up our East Coast oil spill successfully in just a week. This right here is complete proof of our superiority. Hoo-ah.
Of course, the skeptics to my claim will say that the extents of the disasters in both places are vastly different with the one in America being a hundred times worse than ours.
To appease my critics, let me bring up a totally related statistic such as our population size. We're almost one hundred times smaller. Which means we have one hundred times less manpower. But, we still cleaned it up well, and fast. My math can't be wrong.
And then, there's the environmental impact. Usually, I'm not one to be squeamish in horror movies where characters get impaled on spikes, and blood and bone splatters as if the person is a can of paint in a microwave oven. When I watch the Fear Factor, I'm usually laughing when the participant eats some animal's reproductive body part.
But when I see the photos of the damage of the oil spill disaster, I feel sad.
You know what I'm talking about. It's the classic oil spill photograph in which an egret is covered in crude oil and cannot fly. Or the picture of a once golden beach now stained black, with dead fish all over the place. I'm not joking. It's disheartening to watch.
And now you ask: what has this got to do with lo-fi photography? Bear with me, I'm getting there.
Photography is a bit like a photo of an aquatic bird covered in oily muck. Imagine looking at a simple picture of a duck floating about and…doing whatever a duck normally does. It's a common, everyday shot, you know, the kind you see beginner photographers snap away as if it'll end up being some Sotheby's masterpiece.
And now, picture that image of the same duck being covered in tar and crude oil. It's still visibly alive, but deep inside, you know it's doomed. The water around it is sickened with the oil slick, and the entire image screams of humanity's evils, and death.
"Photography is a bit like a photo of an aquatic bird covered in oily muck."
This, then, is the point I'm trying to make. An ordinary picture of a duck might be all good and nice, but it takes a thick film of oil to evoke emotional appeal in your audiences. Of course, I'm not saying you should carry around a jerry can of diesel along with your camera and pour it on your subjects every time you take a photo.
Instead, what I have elegantly shown in your past five minutes of reading this article, is that today's tutorial on selective toning is to teach you a way to add that thick film of crude oil on your photos without destroying what's left of our environment.
What Toning Is
In basic terms, toning is what the Wachowski brothers did to the Matrix films, by making it all greenish without making it completely monotone. It's the same in post-processing your digital images. You tone your pictures in order to impart it an ethereal, highly saturated quality reminiscent of cross-processed film. Here's what I mean:

Courtesy Warner Bros.
The Original Form of Toning
Ignore this section if you have never done any traditional darkroom work before, but read on if you are interested.
In the old film days, photographers do selective toning as well. The use of sepia would tone the entire image a soft, low-contrast brown. The use of selenium would tone everything with a slightly magenta shade. Other toning chemicals, such as those with copper (red) or iron (blue), or even uranium (yellow), were used by photographers as well.
Split toning, another form of selective toning, is what happens when we use two or more of these toning chemicals to tone a single print. For example, when the print is immersed in selenium, the property of selenium causes shadow areas in the print to tone first before the rest of the image.
The print is removed before the highlights are affected, and then subjected to another toning process, such as sepia, to tone the rest of the highlights. This selenium-sepia split-toning technique gives the image a unique look. The shadows will take on a slightly magenta-ish quality, whereas the highlights will look yellowish. Couple this with a photographic paper that is cooler in nature, and there'll be a nice mix of warm and cool tones in the final print.
An example of selenium-sepia split-toning:

Photo by Ng J. S.
Toning Digitally
Mastering the techniques of digital toning would give you the foundations for further editing, converting your original pictures into one imitating the effects of film, or even surpassing what traditional film medium cannot do.
We call this the digital darkroom. It's another version of the old darkroom, but with bits and bytes instead of chemical developers and fixers. Adobe Photoshop is the standard manifestation of the digital darkroom. You'll need Photoshop in order to proceed with the rest of the tutorial, but any other similar software will do as well.
The process of image editing is a long and tedious one to explain. There are multitudes of ways to get the final effect that you want, and it is not possible for me to explain everything here. Hence, I shall provide only a simple guide; for more variations, consult myself or toy around with the settings.
Note that the colour properties of pictures from LOMOs or Holgas are not the doing of the cameras, but from the work done on the film and print in the traditional wet darkroom by the lab technicians.
So, I shall start off with a picture that is already decently edited, but not yet selectively toned to resemble that of film. Let's begin with this image that has been edited already.

Photo by Ng J. S.
Here's where it starts getting a little bit complicated. To tone your image, you need a combination of various tools, all found in the Layers palette. These are known as Adjustment layers, and can be used to do many things, among them, to edit the colour properties of your picture.

Channel Mixer

The first of these is the Channel Mixer tool. Play around a little with the sliders and the drop-down menu, and see what it does. All of your pictures consist of 3 channels, red, blue and green, which make up the primary colours that form the image you see. The channel mixer tool allows you to increase or decrease the level of intensity of each channel, allowing you to modify the overall colour cast.
To emulate a cross-processed look (usually yields a dramatic cyan-yellow result that also lacks magenta casts), I used these settings.

Red Channel: R/129%, G/9%, B/-3%, Constant/-15%
Green Channel: R/0%, G/135%, B/51%, Constant/-17%
Blue Channel: R/-18%, G/35%, B/123%, Constant/-13%
To emulate an aged-film look (slightly desaturated and low contrast, purples in the shadows, yellows in the highlights), these are the settings.

Red Channel: R/100%, G/0%, B/0%, Constant/5%
Green Channel: R/16%, G/58%, B/41%, Constant/4%
Blue Channel: R/9%, G/10%, B/51%, Constant/14%
There can be many different variations to give you a spectrum of results, from wild colours to muted, neutral tones. The Channel Mixer adjustment layer requires a little bit of practice to wield effectively, but once mastered, you can have full control over the colours of your image.
Selective Colour

The Channel Mixer tool is not the only utility in the adjustment layers menu that allows you to edit colours. Select the Selective Colour tool in the same menu.
You will see that this is similar to the Channel Mixer tool, but instead of directly manipulating the output of the 3 channels, the Selective Colour tool directly alters the overall colour in the image without dealing with channels. Experienced users of Adobe Photoshop will realize that this concept is almost the same as how the Hue/Saturation tool works, but with more control.
However, while the Selective Colour tool may be preferred by many, it does have a danger of posterization, an effect caused by the limited number of colours a digital image can hold coupled with the heavy editing by the user.
Here are some samples:


Next Lesson
Stick around on this blog to see the next tutorial lesson on Vignettes, Curves and Contrast. I will be overseas, so, wait patiently. :)
Tuesday, June 8, 2010
The LOFI Photography Project
I'm sure you guys recently have already read from BOLD and the Captain about The LOFI Photography Project. Let me elaborate more on what was previously mentioned. What is LOFI? Why LOFI? How will the finished work look like?
As BOLD had briefly explained, LOFI stands for "low-fidelity". It literally means low faithfulness or loyalty. Not to your girlfriend or boyfriend la, of course! It's low faithfulness to the primary requirements (or rules) of photography such as sharpness, focus, and sometimes even color. These photos usually refer to photos taken with toy cameras, such as Holga, Lomo, Polaroid, so on.
This is because these cameras use plastic lenses which does not produce the same sharpness as that of a glass lens. These cameras are also coupled with problems such as light leakages, inaccurate exposures (you literally have to guess your exposure, unless you're a well trained film photographer which can calculate exposure within the blink of an eye) and focusing problems. Precisely because sharpness and focus is not exactly a requirement in this area of photography, some people may see it as "unorthodox", which is why it is termed this way.
However, don't be mistaken that LOFI images are not worth taking or looking at. Many photographers are able still able to produce excellent images with these cameras such as these-

 This is what is known as Action Sampler, it takes 4 photos one after another on a single frame of film. The red thingie on the sides are due to light leaks.
 This is done with multiple exposures, stacking two different compositions onto one frame.
 (Photos Courtesy | Internet)
Why then, did the Alumni choose to do an exhibition based on this theme?
I believe there should be no rules or boundaries to art. Photography is yet another platform for artists to express their creativity and innermost emotions. When the word "photography" is taken apart, it literally means painting with light. If this medium should allow self-expression, then we should be able to manipulate the light as we deem fit.
Furthermore, as college photographers, the requirements of event photography is very much high-fidelity. This is a chance for all of MJC photographers, past and present to do something very different from what we always do.
To be honest, the Photog Dreams are still there. Even after graduating from MJC for a couple of years now, these lao jiaos still want to do something grand. With their juniors.
As some of you have previously joined in the discussion on Facebook would already know that we are aiming to have around 200 4R entries to fill up an entire wall at the canteen. The exhibition is held in conjunction with College Day (24th July) so J2s and J3s, this is a good time to show your parents the product of your hard work in school! To date, this is probably the biggest exhibition (in terms of quantity) we've ever tried planning. 200 entries will not be too difficult a number to reach if all of you could join in the fun! Each one of you are encouraged to send in 10 photos each, and coupled with your set of entries, you may do a write up of yourself, introducing yourself. The write up will be included in the exhibition.
In your write up, include your NAME, YEAR (e.g. 2005), intro and a fun mugshot of yourself (you can even lofi yourself)!
If you think you don't have 10 entries to submit, no worries, you may still contribute to the photo wall! We'll have a roll call of all the photographers who have submitted photos!
How to submit?
Send in your packaged folder(s) to mjcphotog.alumni@gmail.com with the header containing [NAME][YEAR]part1/2/3
(Example: EUNICE CHAN 2006 Part 1 of 3 if you need to split your photos into a few emails)
You may also send through Yousendit.com to our email with the same header in the event that your email service refuses to squeeze your photos through the poor server....
Remember to include your write up hor!
Submission opens next week! For those who don't know how to photoshop their photos into LOFI, sit tight for Junsen's e-tutorial! *dagger glare at Junsen to hurry up*
Submission closes 4th July 2010 midnight! So get on cracking, go out and shoot!
GOGOGO!
Your Alumni President,
Eunice Chan aka Grouch/G
As BOLD had briefly explained, LOFI stands for "low-fidelity". It literally means low faithfulness or loyalty. Not to your girlfriend or boyfriend la, of course! It's low faithfulness to the primary requirements (or rules) of photography such as sharpness, focus, and sometimes even color. These photos usually refer to photos taken with toy cameras, such as Holga, Lomo, Polaroid, so on.
This is because these cameras use plastic lenses which does not produce the same sharpness as that of a glass lens. These cameras are also coupled with problems such as light leakages, inaccurate exposures (you literally have to guess your exposure, unless you're a well trained film photographer which can calculate exposure within the blink of an eye) and focusing problems. Precisely because sharpness and focus is not exactly a requirement in this area of photography, some people may see it as "unorthodox", which is why it is termed this way.
However, don't be mistaken that LOFI images are not worth taking or looking at. Many photographers are able still able to produce excellent images with these cameras such as these-
This is what is known as Action Sampler, it takes 4 photos one after another on a single frame of film. The red thingie on the sides are due to light leaks.This is done with multiple exposures, stacking two different compositions onto one frame.(Photos Courtesy | Internet)Why then, did the Alumni choose to do an exhibition based on this theme?
I believe there should be no rules or boundaries to art. Photography is yet another platform for artists to express their creativity and innermost emotions. When the word "photography" is taken apart, it literally means painting with light. If this medium should allow self-expression, then we should be able to manipulate the light as we deem fit.
Furthermore, as college photographers, the requirements of event photography is very much high-fidelity. This is a chance for all of MJC photographers, past and present to do something very different from what we always do.
To be honest, the Photog Dreams are still there. Even after graduating from MJC for a couple of years now, these lao jiaos still want to do something grand. With their juniors.
As some of you have previously joined in the discussion on Facebook would already know that we are aiming to have around 200 4R entries to fill up an entire wall at the canteen. The exhibition is held in conjunction with College Day (24th July) so J2s and J3s, this is a good time to show your parents the product of your hard work in school! To date, this is probably the biggest exhibition (in terms of quantity) we've ever tried planning. 200 entries will not be too difficult a number to reach if all of you could join in the fun! Each one of you are encouraged to send in 10 photos each, and coupled with your set of entries, you may do a write up of yourself, introducing yourself. The write up will be included in the exhibition.
In your write up, include your NAME, YEAR (e.g. 2005), intro and a fun mugshot of yourself (you can even lofi yourself)!
If you think you don't have 10 entries to submit, no worries, you may still contribute to the photo wall! We'll have a roll call of all the photographers who have submitted photos!
How to submit?
Send in your packaged folder(s) to mjcphotog.alumni@gmail.com with the header containing [NAME]
(Example: EUNICE CHAN 2006 Part 1 of 3 if you need to split your photos into a few emails)
You may also send through Yousendit.com to our email with the same header in the event that your email service refuses to squeeze your photos through the poor server....
Remember to include your write up hor!
Submission opens next week! For those who don't know how to photoshop their photos into LOFI, sit tight for Junsen's e-tutorial! *dagger glare at Junsen to hurry up*
Submission closes 4th July 2010 midnight! So get on cracking, go out and shoot!
GOGOGO!
Your Alumni President,
Eunice Chan aka Grouch/G
Saturday, June 5, 2010
What is this?

Hi all! I'm back again to tell you more on the above mentioned event!
Bold is dead. For today we welcome the new guest star - Captain Jean-Luc Picard from Star Trek!
Ah welcome Captain!


an example: a member can submit a collection of 10 photos revolving a certain theme/story, the member can do a short writeup on the theme and as well as on him/herself (if you like eating humble pies, we can do the job for you at a daylight robbery price)

no. you send your submissions to mjcphotog.alumni@gmail.com
Friday, June 4, 2010
We might as well be strangers.
 Right before Prom 2009
HAHAHA I KNOW HE IS GONNA KILL ME FOR THIS PHOTO
Good times. Yesterday I met Soonhao at the library. We did our usual "greet shake" and it reminded me how we met. It was during the camp last year when he was like HEY HIGH 5, and I gave a low 5 and then he switched and so did I and one of us were like nah just a knuckle punch and now thats how we greet each other now. AWW.
Where is everyone? I haven't been seeing people from photog in school. BUT today I saw Justin! He was being his young ol'self.
Hope to see you in school.
P.S listen to we might as well be strangers from keane <3
-SA-
Thursday, June 3, 2010
Subscribe to:
Posts (Atom)